
The Ultimate Coleman RoadTrip Portable Propane Grill Review & Setup Guide
Nothing beats the smell of sizzling burgers or perfectly seared steaks when you are out tailgating, camping, or hanging out at the beach. But finding a portable grill that balances genuine raw cooking power with true portability is a tough challenge. Enter the Coleman RoadTrip Portable Propane Grill series.
In this premium deep-dive review, we are breaking down everything you need to know about this iconic portable powerhouse. We will look at how it matches up against its siblings, its core specifications, and walk you through a seamless step-by-step guide to get you cooking out in the wild in minutes.
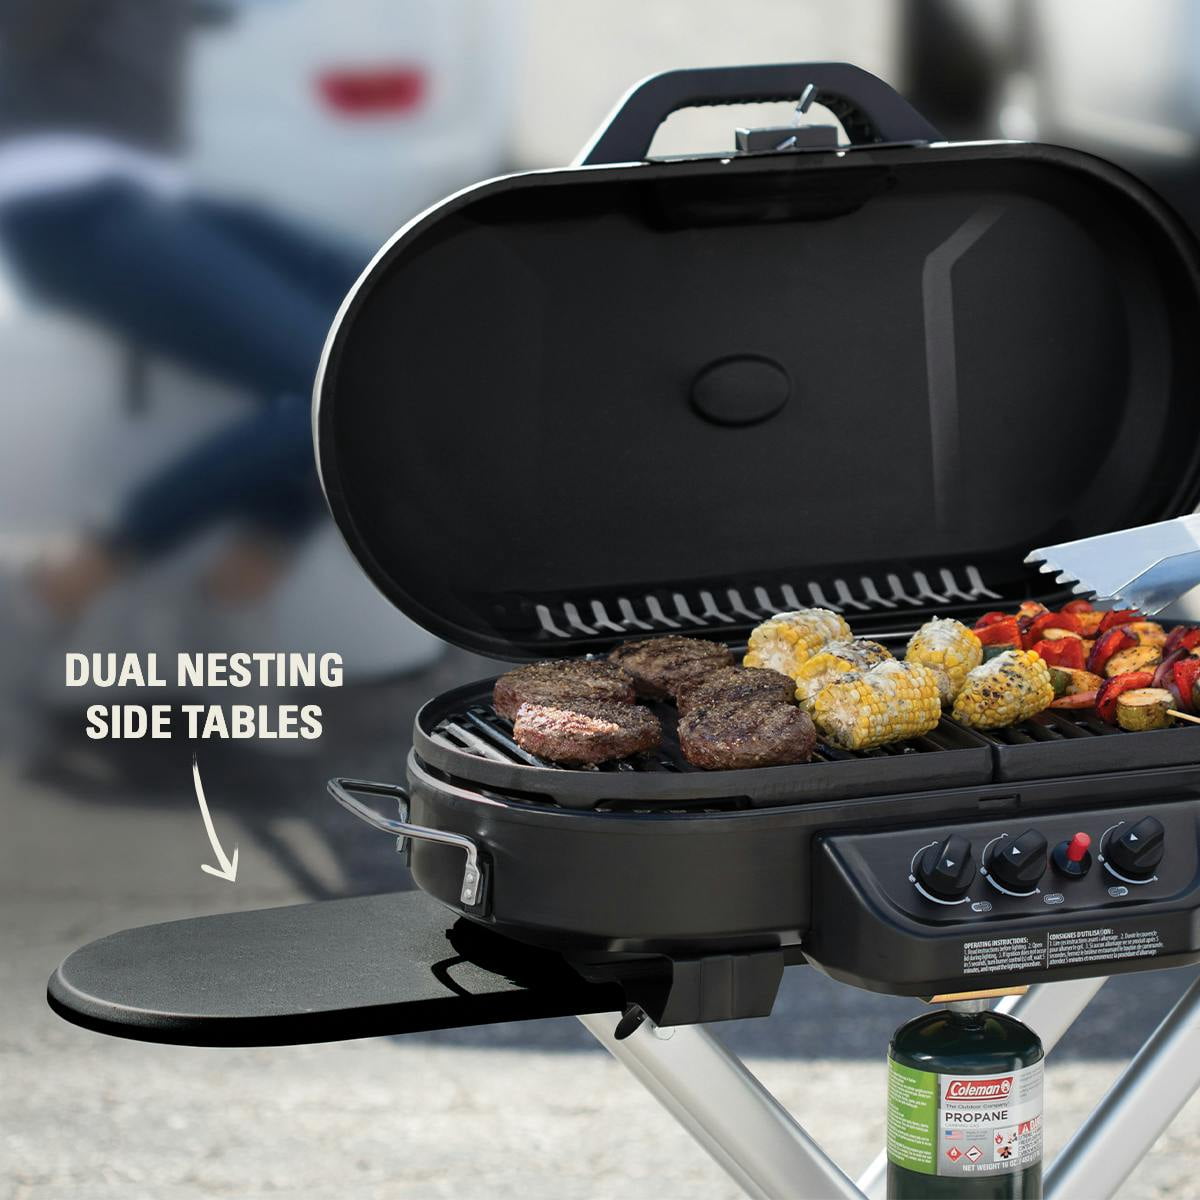
Deep-Dive Review: Performance & Build Quality
The standout feature of the Coleman RoadTrip series is its impressive heat distribution and control. Boasting up to 20,000 total BTUs of grilling power distributed across an engineered multi-burner system, it handles everything from windy conditions to high-heat searing without flinching.
The cooking surface offers a massive 285 square inches of space. That is large enough to comfortably cook for a family or a small tailgating party of 4 to 6 people simultaneously. The grates are made from heavy-duty, porcelain-coated cast iron, which holds heat beautifully and creates those coveted professional sear marks while ensuring food slides right off.
What We Love (Pros)
- Raw Heat Output: 20,000 BTUs easily fights off cold winds.
- Swaptop Grates: Swap out grates for griddles or stove rings (sold separately).
- Instastart Ignition: Smooth, matchless push-button lighting.
- Easy Transport: Scissor-leg design folds down into a rolling suitcase profile.
Things to Consider (Cons)
- Weight: At roughly 43 to 49 lbs, lifting it into a high truck bed requires some muscle.
- Grease Management: Must level the grill accurately to ensure grease flows properly into the tray.
Comparison Guide: RoadTrip 285 vs. 225 vs. Classic LXE
Choosing the right model within the Coleman lineup can be tricky. Below is a direct comparison matrix to help you identify which option matches your specific travel habits and budget requirements.
| Feature | RoadTrip 285 | RoadTrip 225 | RoadTrip LXE (Classic) |
|---|---|---|---|
| Total BTUs | 20,000 BTUs | 11,000 BTUs | 20,000 BTUs |
| Burners | 3 Adjustable Burners | 2 Adjustable Burners | 2 Adjustable Burners |
| Cooking Area | 285 sq. inches | 225 sq. inches | 285 sq. inches |
| Thermometer | Integrated Lid Gauge | No | No |
| Side Tables | 2 Quick-Release Sliding | None (Tabletop layout) | 2 Pull-out Tables |
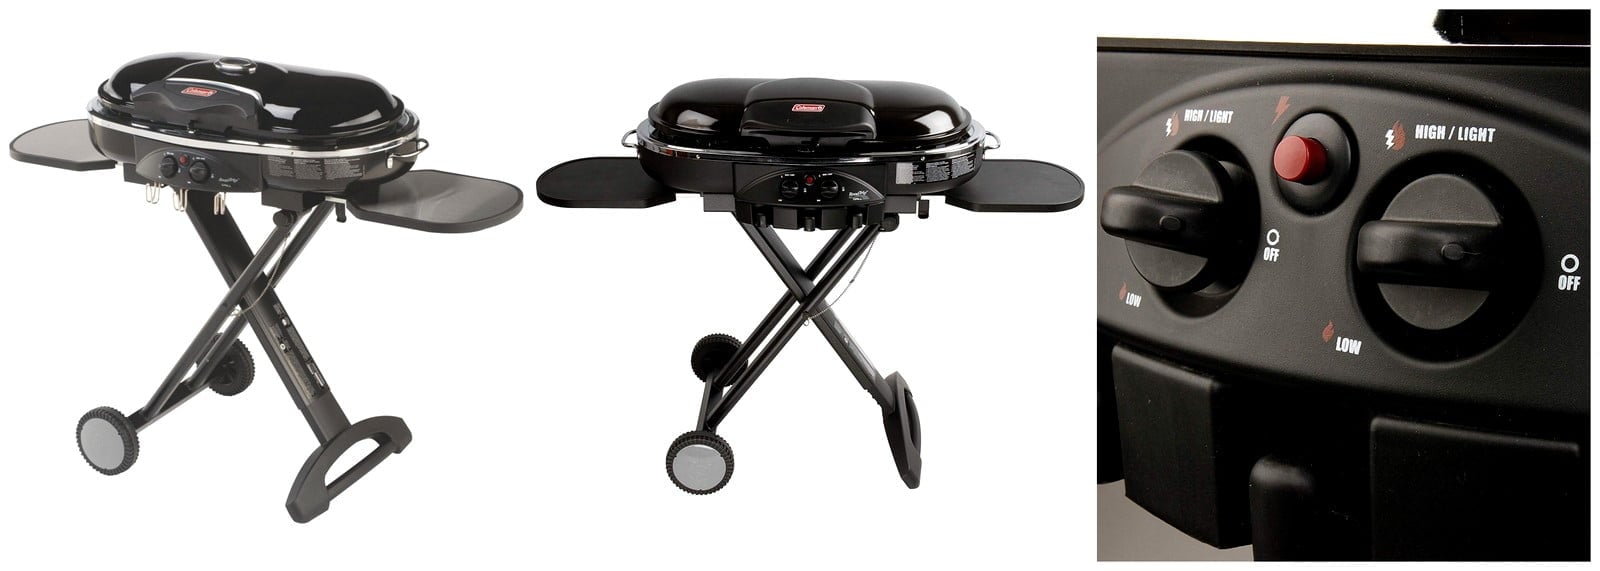
How-To Guide: Setting Up and Preheating Your Grill Below 5 Minutes
The beauty of this grill is its tool-free setup. Follow these exact steps to ensure safe assembly and optimal heat retention:
- Unlatch and Unfold: Lay the folded grill flat on the ground. Press down on the locking handle lever and pull upward smoothly until the scissor legs snap firmly into the standing lock mechanism.
- Secure the Grease Tray: Slide the removable water pan/grease tray beneath the core burner assembly. Pro-tip: Add a thin layer of water or line it with aluminum foil to make cleanup painless later.
- Attach Your Propane Source: Screw a standard 16.4-ounce disposable propane cylinder into the regulator assembly located at the rear. Hand-tighten firmly without over-torquing.
- The Matchless Ignition Process: Turn your selected burner dial to the 'High' position, then immediately click the bright red Instastart ignition button until the burner catches flame.
- The Essential Preheating Rule: Close the heavy-duty lid and let the cast-iron grates preheat on medium-high for 10 full minutes before laying down your food. This ensures even cooking and keeps delicate items from sticking to the surface.
The Verdict: Is It Worth Your Money?
If you need a lightweight, tabletop grill for solo backpacking, this model will be overkill. However, if you are looking for a rugged, high-performing cooking companion for tailgating, camper trailer storage, or weekend beach parties, the Coleman RoadTrip series is exceptional. It gives you backyard-quality heat management and grill space inside an incredibly smart, mobile design.


 Posts
Posts


0 Comments